
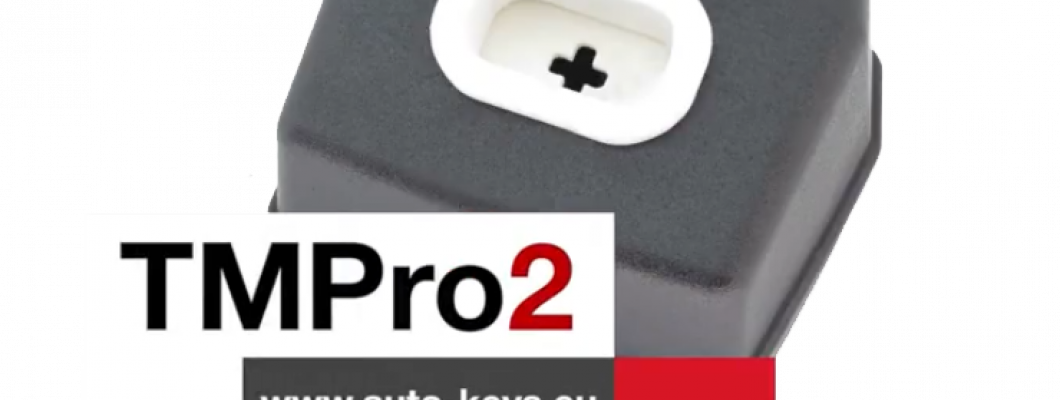
What is TMPro 2
Transponder Maker Pro (also known as TMPro keymaker or TMPro2 keymaker) are softwares for transponder key making,transponder key programming,transponder key copying and PIN code/security code calculating.Protection programmer is small box, which have to be connected to free PC USB port.Software user interface supports 10 languages - Bulgarian,English,French,Portuguese, Polish, Hungarian, Spanish, Serbian, Italian and Czech.They are simply to use and offer wide range of softwares that supports various immoboxes and keys. All softwares are auto-updateable to latest version available on server.At start of software it checks if there is new version released.If released,software automatically updates itselfs,this way you always run latest versions. TMPro2 softwares are designed to help in locksmith`s job.
TMPro 2 is a module based device.Which let you buy the base hardware and then add only the modules you need.
The Basic TMPro kit contains:
- TMPro programmer
- Cables and adaptors for programing microcontrolers and memmories
- USB cable type A to B
- Software for instalation on computer
- Orange5 case
How to use it?
- Connect TMPro to the adapter using via the cable
- Connect TMPro to the computer using the USB cable
How to install the software for TMPro 2?
Follow the steps:
- Disable the driver signature for windows.
- Go to the start menu , in the search box type CMD , right click on Command Promnt and select Run as administrator.Click Yes if Windows ask for permition.
- Inside the opened window you need to type the following 3 lines,and press Enter after every single line:
- bcdedit /set testsigning on
- bcdedit -set loadoptions DDISABLE_INTEGRITY_CHECKS
- bcdedit.exe - set TESTSIGNING ON
- Click here to download the drivers from our website.
- Click here to download the software from our website.
- In your Device Manager tab will appear Other devices, click it to expand and you should see the "Orange5".
- Open My Computer , open drive C: , make a new folder called TMpro2.Extract the downloaded archives in that folder(C:\TMpro2).
- Open TMPro2software folder, and right click on the TMPro2.exe file. Select send to Desktop to create a shortcut for the software on your Desktop.
- Go to your Desktop, right click on My Computer and select Manage.
- From the opened window click on Device Manager.
- Connect your TMPro2 with your computer with the USB cable.
- On the window(Computer Management), choose Other devices and your Transponder Maker Pro should appear. If it does not appear then try to plug the cable out and in again.
- Press the right button on your mouse and choose Update Driver Software.
- Click Browse my computer for driver software.
- Click Let me pick from a list of device drivers, press Next.
- Click on Have Disk, click Browse, go to My Computer, click on Lockal Disk(C:), click on TMpro2 folder.
- Open the TMPro2Drivers folder, choose the ftdibus file and click Open
- On the window Install From Disk press Ok, press Next.
- Click Install this driver anyway. The instalation may take a while so please be patient.
- When the instalation is over, click Close
TMPro2 is now ready for work!
If you are trying to run TMPro software BEFORE installing of USB drivers, you will face this error: “Program cannot start because FTD2XX.dll is missing”.
If in left down corner of software you see message “Hardware NOT found“, this means that something with driver instalation is wrong.
Restart computer and try again with installation.You can check if hardware installation is good – in Device Manager – USB devices – you have to find “Transponder Maker Pro 2“.
NOTE about automatic updates:
- If you are running version of main software 2.352 and older, automatic software update will not work.
- To enable automatic updates: at first you must DELETE this old version of software.
- Then automatic software update will work again and you will receive updates.
NOTE for owners of older hardware without round 8-pin connector:
If you wish to upgrade your hardware for to use full functionality, you must buy upgrade set.
How to upgrade your TMPro with the new and improved interface:
- If you dont have TMPro renew kit go to : auto-keys.eu. You will need TMPro renew kit, Soldering and Screwdrivers.
- Disassemble your old TMPro:
- Remove the 2 body holder screws. They are on the back of the TMPro.
- With hands remove the port. Do not use too much force.Be carefull not to damage the wire connector inside.
- Desolder the wire connector.
Use the soldering iron to desolder the wire connector. - Separate the PCB from the board.
Remove the screws using screwdriver. - Prepare the new TMPro.
Disassemble your new TMPro interface into 3 components. - Attach the PCB to the board using screwdriver.
- Place the Connnector into its socket and fix it with the nut.
- Place the botton cover and use a screwdriver to fix it in possition.
- Use soldering iron to solder the coil with the wire connector.
- Possition the coil into the socket and press down with your hands untill its fixed into place.
For more videos about TMPro 2 check our youtube channel here
1677 Comment(s)
The post gives readers a useful foundation for understanding the subject. The organized sections and accessible language create a comfortable reading experience from beginning to end.
A useful post with a straightforward approach to its subject. The logical organization makes it convenient for readers to move through the information and understand the key points.
The article provides relevant information in a clean and readable format. The author maintains a consistent tone and connects the different parts of the discussion effectively.
Before starting a 99 exch sign up, I’d check the eligibility rules and account requirements. It’s better to know those details ahead of time.
The article explains its subject in a clear and practical way. The information is arranged carefully, making it easier for readers to understand the main discussion.
This post provides a useful overview with a natural writing style. The author keeps the information relevant and creates a smooth transition between different ideas.
A thoughtfully organized discussion that stays focused on the main topic. The writer provides useful details while keeping the overall presentation straightforward and accessible.
The article has a good balance of information and readability. The logical structure helps readers follow the subject and understand how the different points connect.
This article provides an informative overview without excessive detail. The simple explanations and connected ideas make the discussion accessible to a broad audience.
The content is presented with good clarity from beginning to end. The author provides relevant explanations while maintaining a comfortable pace throughout the discussion.
This post demonstrates a thoughtful approach to organizing information. The ideas are clearly connected, helping readers gain a more complete understanding of the subject.
The writing is clear, structured, and easy to navigate. The author presents the subject in a practical way that allows readers to follow the discussion naturally.
This post provides a useful overview while keeping the writing simple. The author explains the main ideas naturally and maintains a consistent flow throughout the content.
The content follows a sensible structure that supports comfortable reading. The clear explanations make it easier to understand the different aspects of the subject.
Tigerexch247 is generally presented as an online betting exchange and gaming platform focused heavily on sports.
In 2026, having an online betting account is not simply about remembering a username and password. Your 99exch ID can represent access to personal information, account activity, balances, transaction records, and other sensitive details. That makes login security an important part of responsible digital behaviour.
The phrase laser247 home may refer to a gaming homepage, so users should verify the website address and review platform information carefully.
Leave a Comment